Grain-Free Banana Scones

Are you looking for something delicious to make on Super Bowl Sunday? Too bad. You will find no such recipe here today.

In the past I’ve pretended to like watching football because that seemed to be the best way to stay in someone’s favor. Then I realized that if someone thinks you like football, they actually expect you to know something about football! Who would have thought?

So needless to say, football is not going to be a featured topic on the blog anytime soon.

But wait! I still come bearing food so don’t leave yet!

Grain-Free Banana Scones

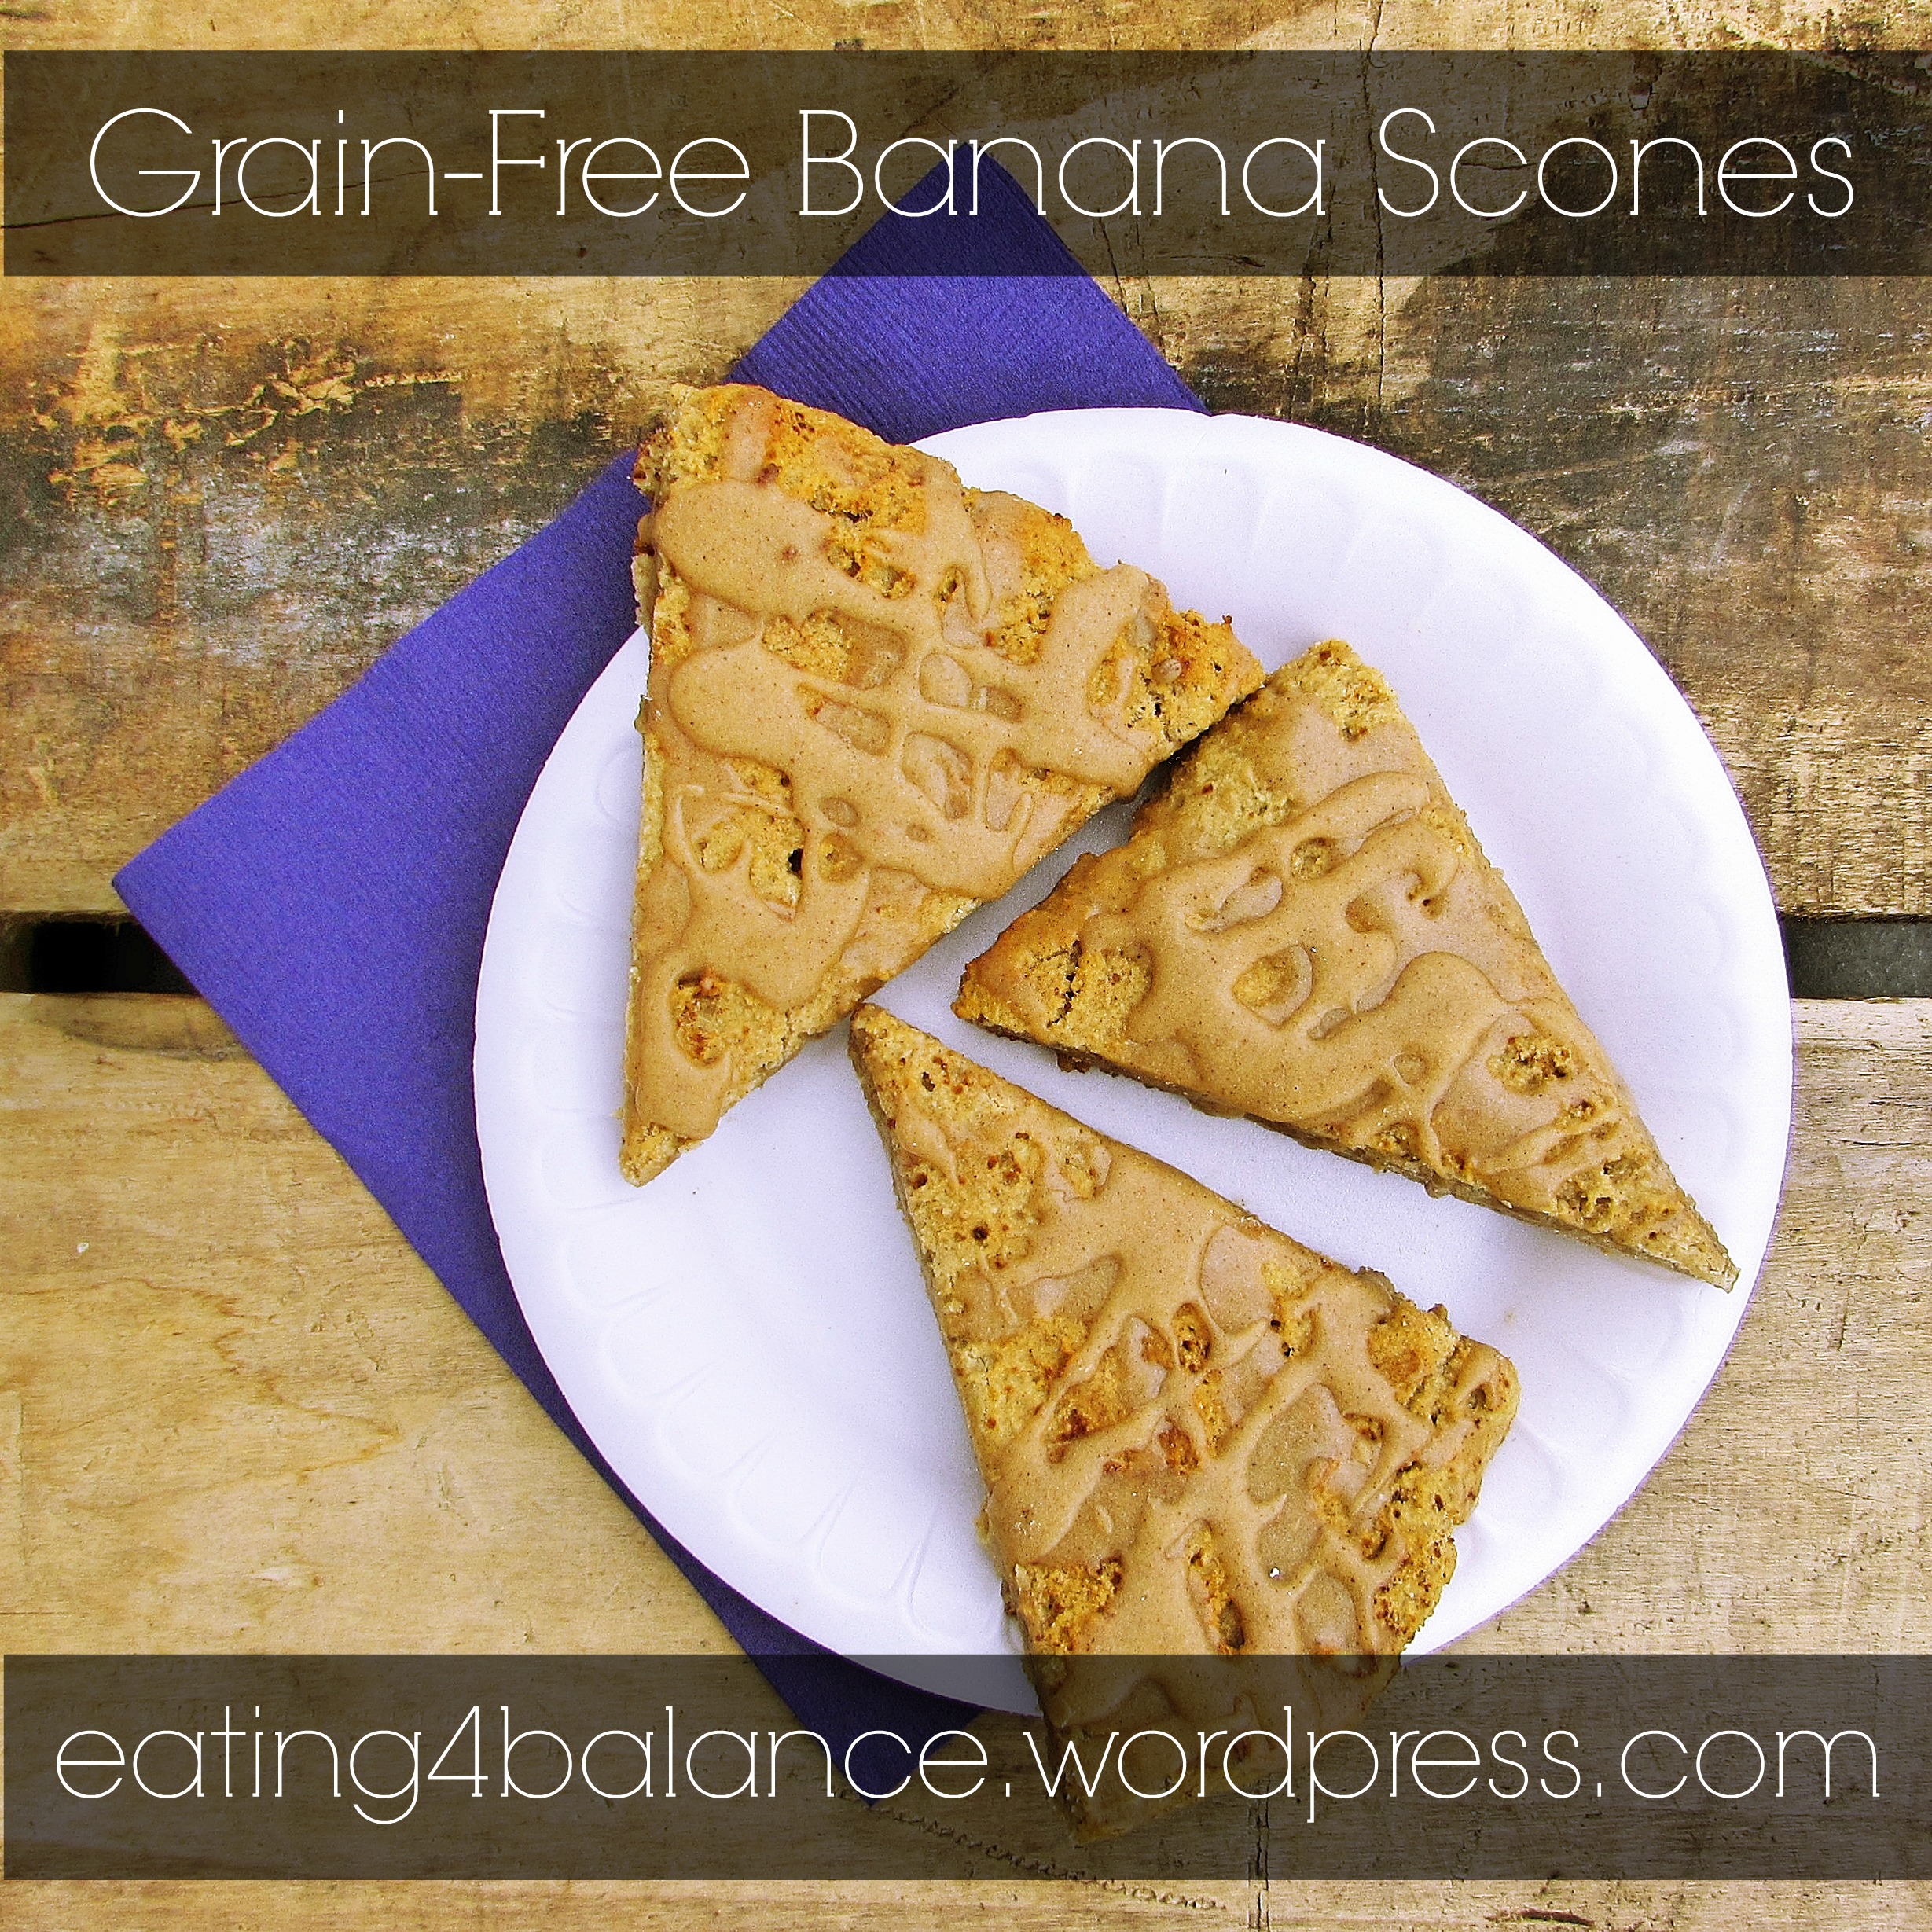
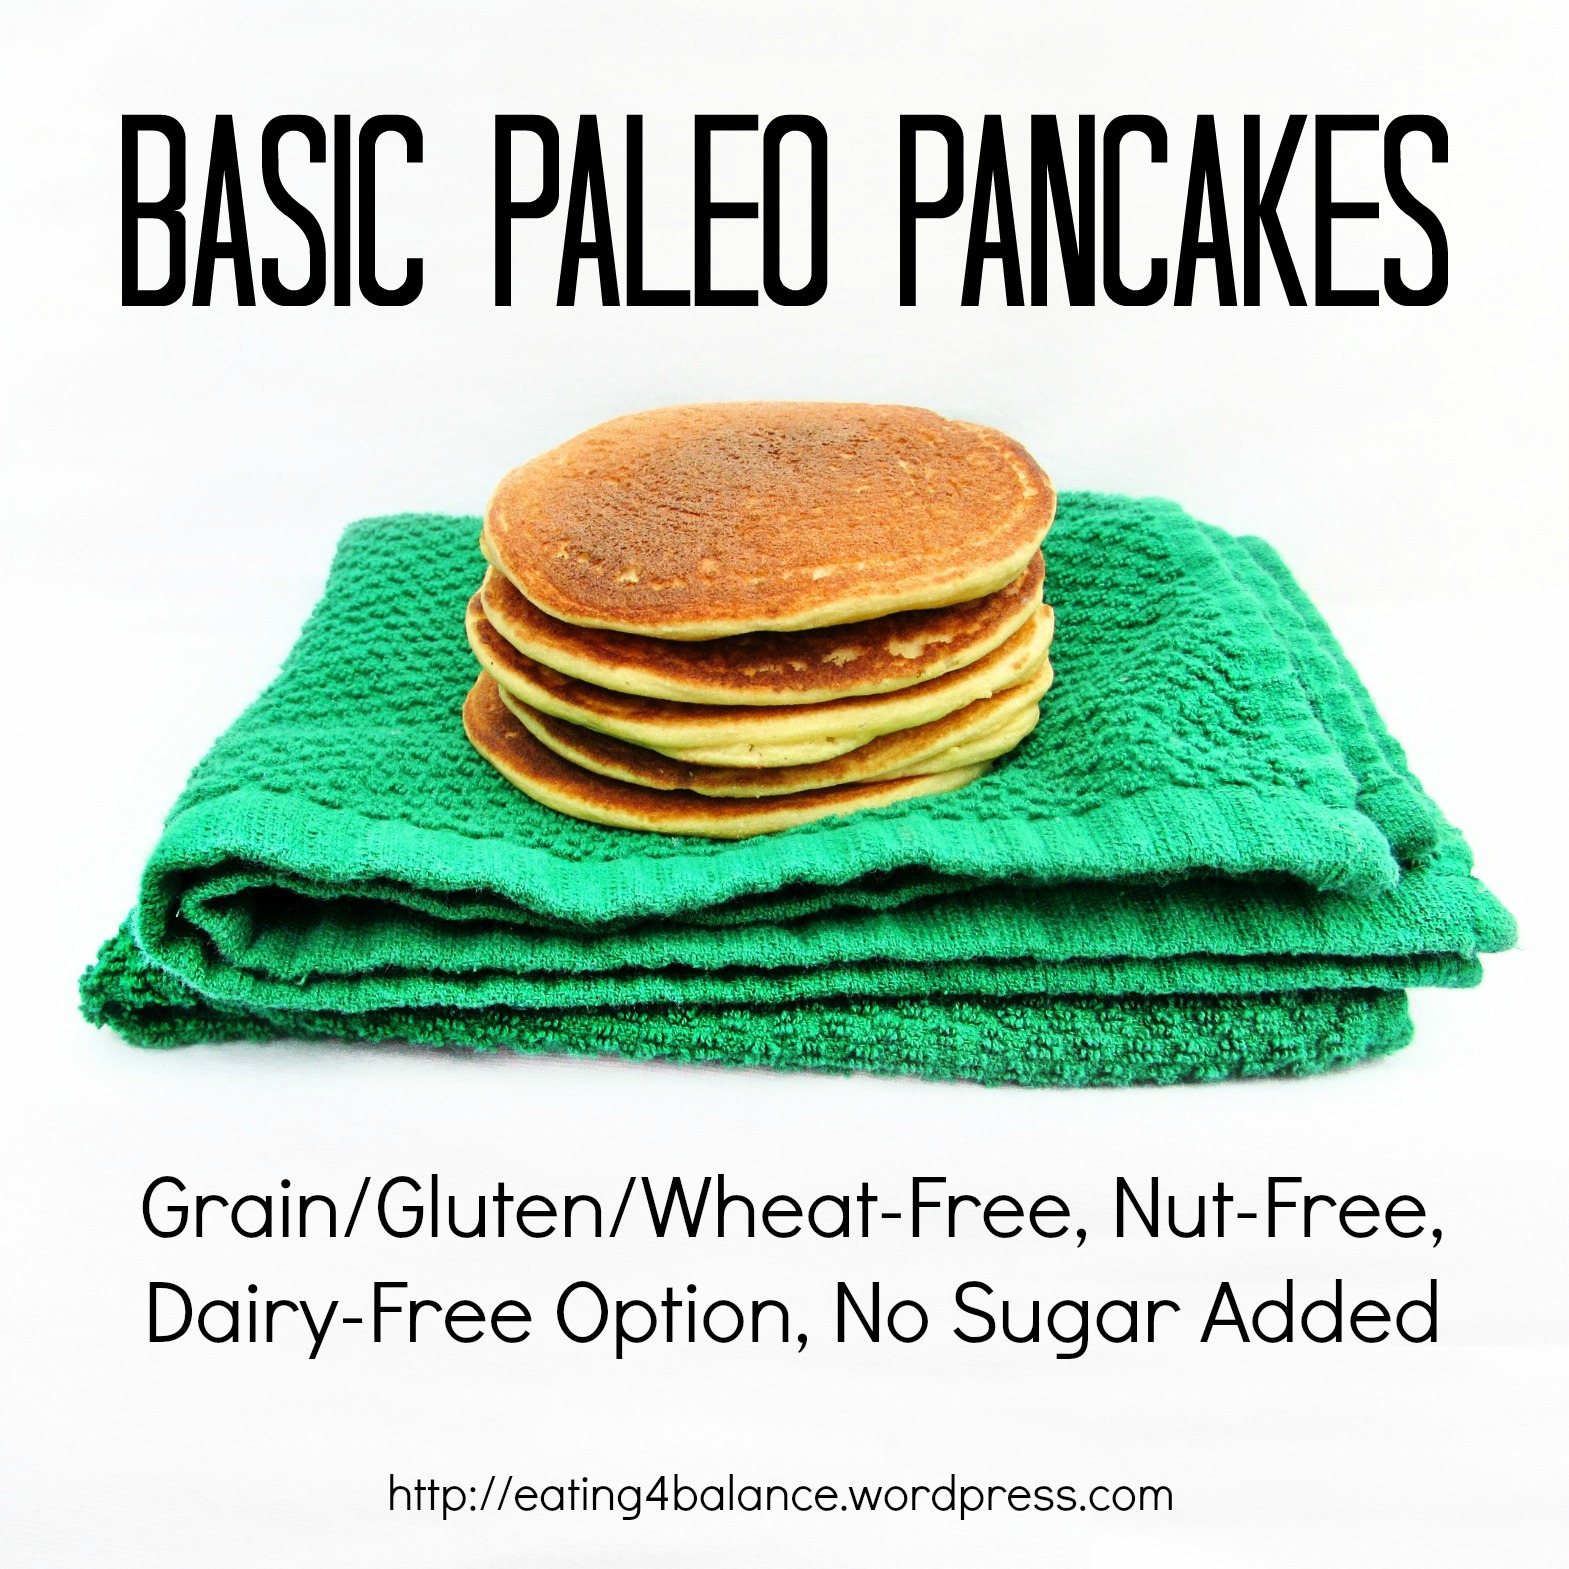
These scones were made because I wanted to photograph something non-circular in shape. No joke. Most of my recipes are round (*cough cough* pancakes *cough cough*), which are a ton of fun to take pictures of… But, sometimes you just want to mix it up and explore other geometric figure possibilities.

That left me with squares, rectangles, or triangles. I guess I could have gone for figures with 5 or 6 sides, but that would just be ridiculous. Who wants to deal with cutting all of those edges?

Better yet, who even cares whether their food is round or triangular? Um, that would be me. 😯

And guess what I just realized?! These are both round (before cutting) AND triangular (after cutting) so they’re twice as good. They’re doing a double team! (Yes, I did have to look up that football reference. Like I said, NO football knowledge here 😉 ).

Oh, and in case you were curious, these triangles are entirely grain-free, sweetened naturally with honey and banana, and have one of the easiest “icings” in the world made from just three ingredients. They do contain eggs, nuts and starch (from baking powder and tapioca), but if you can’t have any (or all) of those ingredients, I have formed one of my longest substitution lists to date. Having limited food choices myself, I hate thinking that someone would have to miss out on these scones  just because of one measly ingredient.

Let’s dive in…

Grain-Free Banana Scones

Grain/Gluten/Wheat-Free, Dairy-Free, Nut/Starch/Sugar-Free Options, Paleo-Friendly, GAPS Option

Makes 8 scones

Grain-Free Banana Scones

Scone ingredients:

  • 2 ripe bananas
  • 1/4 cup honey (or maple syrup)
  • 1 large egg
  • 1 tsp vanilla
  • 1 cup almond flour
  • 1/3 cup coconut flour
  • 1/4 cup tapioca flour
  • 1 tsp cinnamon
  • 1 tsp baking powder
  • 1/2 tsp salt

Icing ingredients:

  • 2 tbsp almond butter (I used salted)
  • 2 tbsp softened coconut oil
  • 2 tbsp honey (or maple syrup)

Directions:

  1. Preheat oven to 400 degrees and line a baking sheet with parchment paper.
  2. To make this quick and easy, add the wet ingredients to a food processor and blend until smooth. Then add the dry ingredients and mix until they are fully incorporated. Another alternative would be to mash the wet ingredients together in a bowl and then add the dry ingredients until completely mixed.
  3. Whatever method you choose, let it sit for a few minutes to let the coconut flour soak up in the dough. It should be thick but still somewhat wet.
  4. Next take the dough and roughly form it into a ball, placing it in the center of the parchment paper (Now, it’s going to be somewhat sticky but it’s all in the name of delicious food, right?!). Wet your hands with water and form the dough into a circle about 8-10 inches in diameter.
  5. Bake for 10 minutes and then score into eight slices (normally you would do this before baking, but the dough is too wet). Put the baking sheet back into the oven again and bake for another 8-12 minutes or until the edges start to turn golden brown.
  6. Remove the scones and let them cool for five minutes. Meanwhile combine all of the icing ingredients and once the scones are cool use a spoon to drizzle. If needed use a knife to further separate the scones and then enjoy!

*Substitution notes:

  • To make these nut-free replace the almond flour/butter with a seed alternative like sunflower or pumpkin.
  • To make these vegan you can use maple syrup instead of the honey, and a flax egg would probably work in place of the egg, although I cannot guarantee the results.
  • If you absolutely cannot get a hold/eat coconut flour, my suggestion would be to replace it with 1 cup of almond flour, and remove one of the bananas (and possibly even the egg- check the batter first for consistency and see how it holds together).
  • To make this sugar-free, replace the honey with 4 tablespoons of date puree or mashed banana, and add stevia to taste if desired.
  • If you cannot handle starch you can replace the tapioca flour with a few additional tablespoons of coconut flour and use 1 teaspoon of baking soda instead of the baking powder (this will result in a less fluffy scone though).

Grain-Free Banana Scones

Just in case you really do desperately need a dish for game day, I do happen to have one very scrumptious gluten-free and dairy-free recipe for Chili, Chips, and Cheeze. If those three words don’t scream sports food I must know even less about the sport than I had previously thought.

My opinion is that you should make up a plate of the Chili, Chips and Cheeze for dinner. Then make these scones and go to town. No one would be the wiser that either are healthy and you could easily sit down to large plates of both not feeling deprived in the slightest. So go, make haste to the grocery store and pick up everything you need to make these two marvelous dishes!

—————————————————————————————————————–

I’m linking this post up with Jenn at Peas and Crayons today. Make sure to check it out for even more WIAW posts!

P.S. Don’t forget about the giveaway going on now!

——————————————————————————————————————

Questions for you:

  • Do you like watching football? Who do you want to win?
  • What is your favorite thing to make on game day?
  • Think back to some of your most recent posts… What is the shape of most of your recipes?

Happy Herbivore Light and Lean Giveaway… Finally!

As you may remember, way back in October I participated in a pre-release blog tour for Lindsay Nixon’s newest cookbook, Happy Herbivore Light and Lean (check the post out for an interview with Lindsay and a Chocolate Chip Cookie Recipe!). A few weeks later I received my copy and promised a giveaway. Giveaways are marvelous, am I right? 😉

hhll-me-final

Well, today’s the day I am going to deliver! I wanted to wait until the holidays had settled down and we were all back to regular blogging activities before hosting this giveaway. I know several bloggers took breaks and just returned recently to posting. Also, I personally didn’t do as much blog reading for my three weeks of winter break and I’m sure many of you were the same. So in light of all of this I didn’t want anyone to come back and find they missed out on this opportunity!

Disclaimer: Although I received a free copy of Happy Herbivore Light and Lean to review, I did not receive any monetary compensation and all thoughts and opinions are entirely (100%) my own.

LIGHT

Review

As I’ve mentioned before, I am kind of atypical in the sense that I like to read cookbooks like I would any other fiction novel. And the night I received Happy Herbivore I got into bed and read through the entire thing just like I do when I get the newest release from my other favorite authors.

Here are my brief thoughts on the overall presentation:

The first thing I noticed as I flipped through the pages was the COLOR. There was not a single page that lacked color. With today’s technology I don’t think there is any excuse for black and white cookbooks (save for those spiral bound fundraising books made by the occasional old lady’s church group). Unlike most cookbooks that I’ve found where the only color is in the pictures of the food, each page had a complimentary color scheme and was just as fun to look at as the pictures themselves.

hhll-cookbookpage

Source

On each page there are extremely helpful sections to denote everything you would ever want to know about the recipe. You have allergen information at the top, nutrition information in the corners, and chef notes listed at the bottom. The majority of the page of course is taken up by the recipe with the ingredients and serving amounts on the side, and the directions written in paragraph format under the recipe description. As someone who usually writes recipes using numbers, I was at first a little surprised by how the directions were written out. After reading through the first few though, I began to like the flow and it made cooking seem more like the art it should be and less like some robotic GPS making you complete the first step before carrying onto the next (it’s something that I’m considering changing with my own recipes, but we’ll see!).

Also important to point out is that the pictures are not included on the recipe page but on the opposite facing page of the cookbook, making the directions and instructions less cluttered and giving room for a full page, full color shot of whatever you’re making.

hhll-wrap

Source

That was the middle essence of the cookbook. The beginning consists of an introduction with a personal note from Lindsay, an index for all of the recipes listed by calorie count, tips on getting started, a shopping list, an explanation of caloric density, tips on lightening up your day, her personal health journey (loved this!) and an explanation of how to use the icons featured in the book.

hhll-lindsay

At the end there is the appendix which has a glossary of ingredient descriptions, substitution ideas, kitchen prep “lingo,” additional resources, metric conversions, and an index where you can find a recipe both by its name and by ingredient.

Personal Note

When I spoke of this cookbook last, a few people commented to me that they didn’t understand why I was promoting something vegan. “Don’t you eat meat?” Yes, yes I do. I’m not going to pretend that I don’t eat meat and I’m not going to apologize for it either. My motivation behind reviewing this book was not to promote a vegan diet (or plant-based as many call it). I came at this from the position of someone who has food allergies, and recipes that are vegan are naturally perfect for those who are allergic to animal products like eggs, dairy, meat, fish, etc. Also, since Lindsay promotes mostly lower fat recipes, about 99% of the food is also peanut-free, nut-free and coconut-free too!

Food Allergies

So, with that point made, here are a few recipes that I think would be great for those with food allergies or various other dietary needs when it comes to food:

  • Balsamic-Dijon Vinaigrette (pg. 137)
  • Homemade Ketchup (pg. 8)
  • Chocolate Surprise Frosting (pg. 12)
  • Brody’s Gluten-Free Flour Blend (pg. 267)
  • Everyday Mushroom Gravy (pg. 189)
  • Deviled “Eggs” (pg. 203)
  • Pumpkin Spice Latte (pg. 256)
  • Oatmeal Pancakes (pg. 97)
  • Sweet Potato Ice Cream (pg. 236)
  • Microwave Peach Cobbler (pg. 137)
  • Breakfast Tacos (pg. 145)
  • Smoky Apple Baked Beans (pg. 172)
  • Asian Orange Kale Salad (pg. 179)
  • Loaded Mexican Potato (pg. 195)
  • Carrot Soup (pg. 236)
  • Skinny Pad Thai (pg. 161)
  • Nacho Bowl (pg. 93)
  • Leftovers Pot Pie (pg. 121)
  • Caribbean Chili (pg. 116)

Other Reviews

If you want to check out all of the other bloggers who participated in the tours (along with their reviews and some sneak peak recipes!) check out this post and this post.

A few highlights were Kaila from Healthy Helper Blog who shared Meatloaf Bites:

hhll-meatloaf-bites

Laura from Plant-Based Junkies with a Thai Crunch Salad:

hhll-thai-crunch

And the Herbivore herself with a recipe for Pumpkin Pancakes:

hhll-pumpkin-pancakes

LEAN

Review

Finally, as indicated in the title, Happy Herbivore Light and Lean also features an exercise section with a list of exercise suggestions that are 30, 20, 15 or 10 minutes in length and all burn 100 calories. Next she gives tips on how to fit exercise into your day and continues on with pages of workouts along with her personal trainer friend Jon Warren. My favorite part of this section was “Lindsay’s Body Blast” at the end where there is a page long description of a workout that Lindsay frequently does.

Here is a little snippet from the book explaining what the “Body Blast” is:

“This all-in-one exercise is what I do when my time (and space) is limited. It’s a little on the advanced side, so you may need to work up to it. It’s a killer circuit and I have a lot of fun challenging myself, drill-instructor style, to see how fast I can move through the exercise (while still keeping proper form!) and how many rounds I can go through before I’m wasted. (Usually two, but I’m a work in progress!)”

hhll-lindsay-jon

Source

I have yet to try this out myself, but from just reading it over I think “killer” is the perfect description. One day when I build up the guts to do it I’ll report back and tell you how far I got!

Conclusion

Really, there’s nothing much more to say other than I am confident that you will love this book if you love cooking and baking as much as I do. This is my second book of Lindsay’s and I have enjoyed it just as much as the first. I know the soup recipes will come in hand this winter and the fresh delicious salad ideas will be welcome during spring. The true test of a good cookbook is its versatility across not only seasons, but also palettes (in this case, I am referring to food allergies) and this book truly has something for everyone.

Giveaway

hhll-cookbook-full

If you made it through all of that, bravo! And if you just skipped to the bottom to win the giveaway, I can’t really blame you for that either. This giveaway goes live as soon as I publish this post. It will end one week from tonight and I will announce the winner next Monday morning after using Random Number Generator to pick who wins the cookbook.

Unfortunately this giveaway is limited to just U.S. and Canadian citizens (I can already hear the groans… I’m sorry!). However, if you would still like to participate and someone outside of the United States or Canada wins, I will give a consolation prize of allowing you to write a guest post on my blog about whatever your heart desires (within reason of course). Sound fair?

After I announce the winner, you will have three days to contact me via e-mail with a viable address or I will be forced to pick someone else.

Like with all of my past giveaways, I am going to include a number of ways that you can enter. I do this so that if you aren’t able to complete one of them for whatever reason then you still have several opportunities to win. You don’t have to do them all, but make sure to leave a separate comment for each below::

  1. Tell me what your #1 deal breaker is for a cookbook (Mine is obviously good pictures and color!).
  2. Follow me on Bloglovin or by e-mail (there is an entry box in the right side bar below my social media icons).
  3. Follow me on Instagram.
  4. Follow me on Pinterest.
  5. Follow Happy Herbivore on any of her social media sites: Twitter, Instagram, or Facebook.

And if by some chance you don’t win, make sure to check the cookbook out on Amazon where you can purchase it in e-book format for $9.99 or in paperback for $11.97. Really great prices for over a 300 page cookbook!

BBQ Chicken Pizza

Whole Wheat BBQ Chicken Pizza (w/ allergy-free options)

Confession time: Until I opened my Bloglovin this morning and saw the barrage of Recipe Redux posts from my fellow food bloggers, I had completely forgotten that the 21st was the reveal day for January! I could excuse my absent-mindedness with mumblings of school work, but that would just be silly since I received an email recently from the Redux team as a reminder.

Recipe Redux

At first I was hopeful that the recipe I had already would fit the bill… but unfortunately scones do not look similar enough to pizza to count. 😦

Then I remembered a pizza that I had made a very very long time ago. In fact, it was SO long ago that I actually had shared the pictures on my old blog way back in 2012 with promises to “share it soon.” Yes, so now over a year later I am finally making good on that promise.

While it’s not gluten-free or much in line with what I usually post, I have included a host of substitution options below the recipe instructions that should give you plenty of ideas. It’s a recipe that I used to make monthly before discovering my food allergies. In fact, bringing up these old pictures reminded me how much I love making pizza, so this will have to happen again sometime soon — I adapted the dough from the Master Pizza Dough recipe that I found on AllRecipes my freshman year of high school. It’s a keeper.

Whole Wheat BBQ Chicken Pizza

Whole Wheat, Egg-Free, Nut-Free, Dairy/Meat-Free Options, Vegan Option

Tomato-Free Option, Grain/Gluten/Wheat-Free Suggestions Below

Makes Approximately 12 slices

Whole Wheat BBQ Chicken Pizza (w/ allergy-free options)

Pizza dough*:

  • 1 cup warm water
  • 3-4 cups whole wheat pastry flour (or unbleached all purpose)
  • 2 tbsp olive oil
  • 1 envelope rapid rise yeast
  • 1/2 tsp salt

Pizza toppings:

  • 1 cup barbecue sauce*
  • 1-2 cups shredded mozzarella cheese*
  • 2 cups chopped grilled chicken*

Directions:

  1. Preheat oven to 400 degrees. If using a pizza stone, place it in the oven now. If using a baking sheet, either oil it or cover it in parchment paper.
  2. In a large bowl combine 2 cups of the flour with the yeast and salt. Then stir in the warm water and olive oil. Add extra flour as needed to make a soft dough.
  3. Prepare a floured surface and knead the dough until smooth and elastic (I usually do this for about 4 minutes). Leave the ball of dough on the floured surface, cover it with a towel, and let it rest for 10 minutes.
  4. Next take the ball of dough and place it on your chosen baking pan (sprinkle the pizza stone with flour to prevent sticking). Shape it into a large circle, about 14 inches in diameter. Place in the oven and bake for 10 minutes (this will prevent the pizza from burning on top and being undercooked in the middle).
  5. Take the pizza dough from the oven. Spread the barbecue sauce onto the pizza, leaving a one inch rim around the outside for the crust. Sprinkle the cheese on top and then the chopped chicken.
  6. Put the pizza back into the oven and bake for about another 20 minutes or until the crust is golden brown.

*Substitution options:

  • To make this gluten-free, this version from King Arthur Flour has great reviews.
  • And to make it paleo/grain-free, you have a few options: 1. Instead of the wheat pizza dough, make a cauliflower crust. 2. Another option would be to make my vegan, grain-free biscuits and just spread them out into a large circle, baking for slightly longer than the biscuit recipe originally stated.
  • Here is a list of great and healthy BBQ sauce recipes if you don’t want to use a store bought one. (Here is a homemade tomato-free BBQ sauce recipe if you can’t eat tomatoes).
  • To make this vegan, you can replace the dairy cheese with a vegan shredded cheese, nutritional yeast, or a vegan cheeze sauce. For the chicken, you can easily leave this out to make it vegan or vegetarian. Or, replace it with grilled tofu squares, cooked chickpeas, or even chopped vegetables like mushrooms/onions/etc.

Whole Wheat BBQ Chicken Pizza (w/ allergy-free options)

Now, for the other Recipe Redux participants and their pizza recipes, check them out below:

Oh, and because I can’t hold in my excitement for another day, here is the picture for the scones that was going to be up today. With two recipes already posted in the past few days though, I’ll probably wait until next week to share these. Try to contain your excitement 😉

Scones

And I hope you didn’t forget that it’s Wednesday– aka, one of THE greatest days of the week. Head on over to Peas and Crayons with Jenn for even more amazing food pictures.

With both The Recipe Redux and WIAW link-ups to keep you busy, I don’t know how you are going to have time for anything else today ***insert evil laugh here***

————————————————————————————————————————————————

What have you forgotten recently? Stories please!

Have you ever made homemade pizza before? What’s your favorite kind?

What food picture were you most excited to share in WIAW today?

Basic Paleo Pancakes

Basic Paleo Pancakes

It feels like it has been eons since I posted a recipe, and while I have been enjoying sharing more life updates and fun posts it is time to get back to where this blog is really at. Allergy-friendly food!

Yesterday I whipped up a batch of pancakes which I adapted from PaleOMG. Her recipe called for milk which I decided to increase and then replace with a mixture of yogurt to up the protein content. I also added a teaspoon of apple cider vinegar to replicate the taste of buttermilk and to sour the yogurt for a more traditional pancake flavor. Along with the eggs and coconut flour, the added yogurt amps the protein content of these pancakes up to 32 grams total or 16 grams per serving for two servings. For a recipe that tastes as delicious as this, that number is pretty impressive.

Basic Paleo Pancakes

I further adapted the recipe by omitting the added honey and raspberry lemon topping so that these would be plain. That way this recipe can serve a base pancake and you can add whatever your heart desires! The yogurt and coconut flour add even sweetness naturally but if you prefer a dessert-like pancake you could add in a tablespoon or two of sweetener (honey, maple syrup, stevia or coconut sugar to keep them paleo).

Basic Paleo Pancakes

Grain/Gluten/Wheat-Free, Nut-Free, Dairy-Free Option, Paleo-Friendly, No Sugar Added

Makes 2-3 servings; 10 pancakes total

Adapted from recipe by PaleOMG

Basic Paleo Pancakes

Ingredients:

  • 1/2 cup yogurt (use coconut or almond yogurt to make dairy-free)*
  • 1/2 cup water*
  • 1 tsp apple cider vinegar
  • 3 large eggs
  • 1 tsp vanilla
  • 1/2 cup coconut flour (link)
  • 1/2 cup tapioca flour (link)
  • 1/2 tsp baking powder (link)
  • 1/2 tsp baking soda
  • 1/8 tsp salt

Directions:

  1. Preheat griddle to 350 degrees or a skillet to medium-high. Coat with oil to prevent sticking.
  2. Mix together the yogurt, water and vinegar. Set aside.
  3. In a small bowl combine the dry ingredients. In a separate larger bowl then combine all of the wet ingredients.
  4. Add the dry ingredients to the wet ingredients and stir until thoroughly incorporated. Let rest for a few minutes so that the coconut flour can thicken up the batter. After about 5 minutes check the batter. It should be the consistency of regular pancake batter- thick but easily pourable. Add additional water to thin out or additional coconut flour to thicken if necessary.
  5. Using a 1/4 cup measuring scoop pour the pancake batter onto your griddle/skillet, spreading it out with the back of the scoop. Cook for about 3 minutes on each side. Repeat for additional pancakes.
  6. Drizzle with honey or maple syrup, top with your favorite add-ons like diced apples or berries, and enjoy!

*Note: If you don’t have yogurt on hand, you can also replace the yogurt/water mixture with 1 cup of milk. Start off with about 1/2 cup and increase as needed to ensure the batter doesn’t get too thin. I’ve used 1 cup coconut milk before and that worked well.

Basic Paleo Pancakes

Even though the pancakes went cold as I was taking pictures and I had to reheat them (whoops!), my family still said that these were the best grain-free pancakes that I had made yet! They are much lighter and fluffier than most grain-free pancakes because of the tapioca flour and baking powder lending themselves to become a staple in anyone’s breakfast rotation.

If you are wanting to make pancakes but don’t have either coconut flour or tapioca flour on hand, check out my pancakes tag for alternative recipes to hold you over in the meantime.

——————————————————————————————————————————

Questions for you:

  • What are you having for breakfast today?
  • How do you increase the protein in your breakfast? 
  • Have you ever used tapioca flour before?
  • What would you mix into these pancakes?