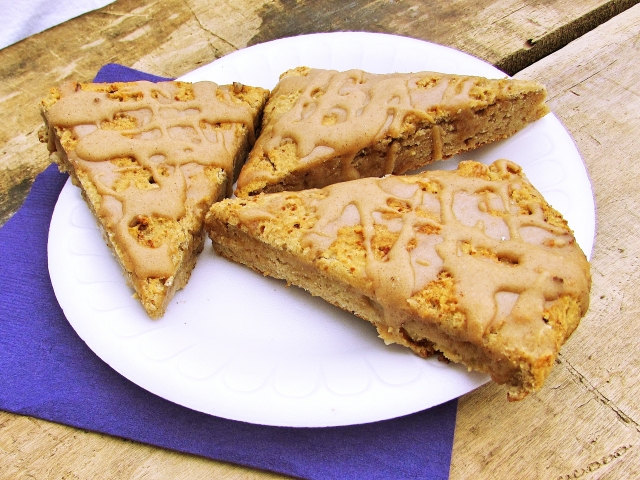
Grain-Free Banana Scones

Are you looking for something delicious to make on Super Bowl Sunday? Too bad. You will find no such recipe here today.

In the past I’ve pretended to like watching football because that seemed to be the best way to stay in someone’s favor. Then I realized that if someone thinks you like football, they actually expect you to know something about football! Who would have thought?

So needless to say, football is not going to be a featured topic on the blog anytime soon.

But wait! I still come bearing food so don’t leave yet!

Grain-Free Banana Scones

These scones were made because I wanted to photograph something non-circular in shape. No joke. Most of my recipes are round (*cough cough* pancakes *cough cough*), which are a ton of fun to take pictures of… But, sometimes you just want to mix it up and explore other geometric figure possibilities.

That left me with squares, rectangles, or triangles. I guess I could have gone for figures with 5 or 6 sides, but that would just be ridiculous. Who wants to deal with cutting all of those edges?

Better yet, who even cares whether their food is round or triangular? Um, that would be me. 😯

And guess what I just realized?! These are both round (before cutting) AND triangular (after cutting) so they’re twice as good. They’re doing a double team! (Yes, I did have to look up that football reference. Like I said, NO football knowledge here 😉 ).

Oh, and in case you were curious, these triangles are entirely grain-free, sweetened naturally with honey and banana, and have one of the easiest “icings” in the world made from just three ingredients. They do contain eggs, nuts and starch (from baking powder and tapioca), but if you can’t have any (or all) of those ingredients, I have formed one of my longest substitution lists to date. Having limited food choices myself, I hate thinking that someone would have to miss out on these scones  just because of one measly ingredient.

Let’s dive in…

Grain-Free Banana Scones

Grain/Gluten/Wheat-Free, Dairy-Free, Nut/Starch/Sugar-Free Options, Paleo-Friendly, GAPS Option

Makes 8 scones

Grain-Free Banana Scones

Scone ingredients:

  • 2 ripe bananas
  • 1/4 cup honey (or maple syrup)
  • 1 large egg
  • 1 tsp vanilla
  • 1 cup almond flour
  • 1/3 cup coconut flour
  • 1/4 cup tapioca flour
  • 1 tsp cinnamon
  • 1 tsp baking powder
  • 1/2 tsp salt

Icing ingredients:

  • 2 tbsp almond butter (I used salted)
  • 2 tbsp softened coconut oil
  • 2 tbsp honey (or maple syrup)

Directions:

  1. Preheat oven to 400 degrees and line a baking sheet with parchment paper.
  2. To make this quick and easy, add the wet ingredients to a food processor and blend until smooth. Then add the dry ingredients and mix until they are fully incorporated. Another alternative would be to mash the wet ingredients together in a bowl and then add the dry ingredients until completely mixed.
  3. Whatever method you choose, let it sit for a few minutes to let the coconut flour soak up in the dough. It should be thick but still somewhat wet.
  4. Next take the dough and roughly form it into a ball, placing it in the center of the parchment paper (Now, it’s going to be somewhat sticky but it’s all in the name of delicious food, right?!). Wet your hands with water and form the dough into a circle about 8-10 inches in diameter.
  5. Bake for 10 minutes and then score into eight slices (normally you would do this before baking, but the dough is too wet). Put the baking sheet back into the oven again and bake for another 8-12 minutes or until the edges start to turn golden brown.
  6. Remove the scones and let them cool for five minutes. Meanwhile combine all of the icing ingredients and once the scones are cool use a spoon to drizzle. If needed use a knife to further separate the scones and then enjoy!

*Substitution notes:

  • To make these nut-free replace the almond flour/butter with a seed alternative like sunflower or pumpkin.
  • To make these vegan you can use maple syrup instead of the honey, and a flax egg would probably work in place of the egg, although I cannot guarantee the results.
  • If you absolutely cannot get a hold/eat coconut flour, my suggestion would be to replace it with 1 cup of almond flour, and remove one of the bananas (and possibly even the egg- check the batter first for consistency and see how it holds together).
  • To make this sugar-free, replace the honey with 4 tablespoons of date puree or mashed banana, and add stevia to taste if desired.
  • If you cannot handle starch you can replace the tapioca flour with a few additional tablespoons of coconut flour and use 1 teaspoon of baking soda instead of the baking powder (this will result in a less fluffy scone though).

Grain-Free Banana Scones

Just in case you really do desperately need a dish for game day, I do happen to have one very scrumptious gluten-free and dairy-free recipe for Chili, Chips, and Cheeze. If those three words don’t scream sports food I must know even less about the sport than I had previously thought.

My opinion is that you should make up a plate of the Chili, Chips and Cheeze for dinner. Then make these scones and go to town. No one would be the wiser that either are healthy and you could easily sit down to large plates of both not feeling deprived in the slightest. So go, make haste to the grocery store and pick up everything you need to make these two marvelous dishes!

—————————————————————————————————————–

I’m linking this post up with Jenn at Peas and Crayons today. Make sure to check it out for even more WIAW posts!

P.S. Don’t forget about the giveaway going on now!

——————————————————————————————————————

Questions for you:

  • Do you like watching football? Who do you want to win?
  • What is your favorite thing to make on game day?
  • Think back to some of your most recent posts… What is the shape of most of your recipes?

BBQ Chicken Pizza

Whole Wheat BBQ Chicken Pizza (w/ allergy-free options)

Confession time: Until I opened my Bloglovin this morning and saw the barrage of Recipe Redux posts from my fellow food bloggers, I had completely forgotten that the 21st was the reveal day for January! I could excuse my absent-mindedness with mumblings of school work, but that would just be silly since I received an email recently from the Redux team as a reminder.

Recipe Redux

At first I was hopeful that the recipe I had already would fit the bill… but unfortunately scones do not look similar enough to pizza to count. 😦

Then I remembered a pizza that I had made a very very long time ago. In fact, it was SO long ago that I actually had shared the pictures on my old blog way back in 2012 with promises to “share it soon.” Yes, so now over a year later I am finally making good on that promise.

While it’s not gluten-free or much in line with what I usually post, I have included a host of substitution options below the recipe instructions that should give you plenty of ideas. It’s a recipe that I used to make monthly before discovering my food allergies. In fact, bringing up these old pictures reminded me how much I love making pizza, so this will have to happen again sometime soon — I adapted the dough from the Master Pizza Dough recipe that I found on AllRecipes my freshman year of high school. It’s a keeper.

Whole Wheat BBQ Chicken Pizza

Whole Wheat, Egg-Free, Nut-Free, Dairy/Meat-Free Options, Vegan Option

Tomato-Free Option, Grain/Gluten/Wheat-Free Suggestions Below

Makes Approximately 12 slices

Whole Wheat BBQ Chicken Pizza (w/ allergy-free options)

Pizza dough*:

  • 1 cup warm water
  • 3-4 cups whole wheat pastry flour (or unbleached all purpose)
  • 2 tbsp olive oil
  • 1 envelope rapid rise yeast
  • 1/2 tsp salt

Pizza toppings:

  • 1 cup barbecue sauce*
  • 1-2 cups shredded mozzarella cheese*
  • 2 cups chopped grilled chicken*

Directions:

  1. Preheat oven to 400 degrees. If using a pizza stone, place it in the oven now. If using a baking sheet, either oil it or cover it in parchment paper.
  2. In a large bowl combine 2 cups of the flour with the yeast and salt. Then stir in the warm water and olive oil. Add extra flour as needed to make a soft dough.
  3. Prepare a floured surface and knead the dough until smooth and elastic (I usually do this for about 4 minutes). Leave the ball of dough on the floured surface, cover it with a towel, and let it rest for 10 minutes.
  4. Next take the ball of dough and place it on your chosen baking pan (sprinkle the pizza stone with flour to prevent sticking). Shape it into a large circle, about 14 inches in diameter. Place in the oven and bake for 10 minutes (this will prevent the pizza from burning on top and being undercooked in the middle).
  5. Take the pizza dough from the oven. Spread the barbecue sauce onto the pizza, leaving a one inch rim around the outside for the crust. Sprinkle the cheese on top and then the chopped chicken.
  6. Put the pizza back into the oven and bake for about another 20 minutes or until the crust is golden brown.

*Substitution options:

  • To make this gluten-free, this version from King Arthur Flour has great reviews.
  • And to make it paleo/grain-free, you have a few options: 1. Instead of the wheat pizza dough, make a cauliflower crust. 2. Another option would be to make my vegan, grain-free biscuits and just spread them out into a large circle, baking for slightly longer than the biscuit recipe originally stated.
  • Here is a list of great and healthy BBQ sauce recipes if you don’t want to use a store bought one. (Here is a homemade tomato-free BBQ sauce recipe if you can’t eat tomatoes).
  • To make this vegan, you can replace the dairy cheese with a vegan shredded cheese, nutritional yeast, or a vegan cheeze sauce. For the chicken, you can easily leave this out to make it vegan or vegetarian. Or, replace it with grilled tofu squares, cooked chickpeas, or even chopped vegetables like mushrooms/onions/etc.

Whole Wheat BBQ Chicken Pizza (w/ allergy-free options)

Now, for the other Recipe Redux participants and their pizza recipes, check them out below:

Oh, and because I can’t hold in my excitement for another day, here is the picture for the scones that was going to be up today. With two recipes already posted in the past few days though, I’ll probably wait until next week to share these. Try to contain your excitement 😉

Scones

And I hope you didn’t forget that it’s Wednesday– aka, one of THE greatest days of the week. Head on over to Peas and Crayons with Jenn for even more amazing food pictures.

With both The Recipe Redux and WIAW link-ups to keep you busy, I don’t know how you are going to have time for anything else today ***insert evil laugh here***

————————————————————————————————————————————————

What have you forgotten recently? Stories please!

Have you ever made homemade pizza before? What’s your favorite kind?

What food picture were you most excited to share in WIAW today?

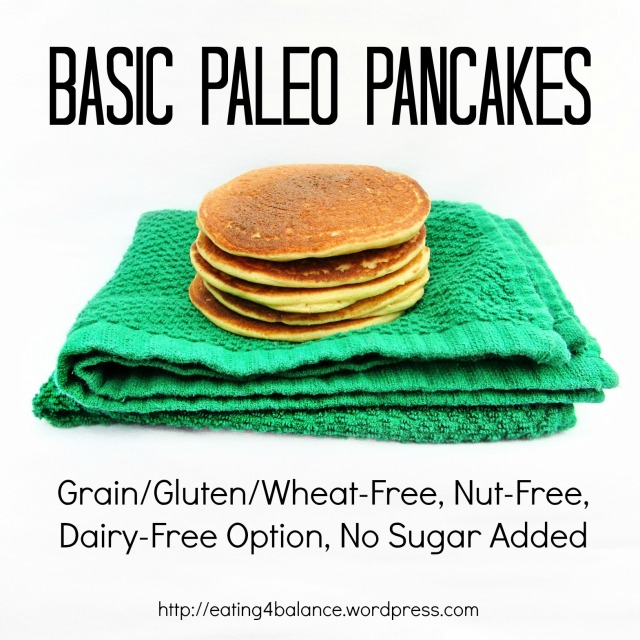
Basic Paleo Pancakes

Basic Paleo Pancakes

It feels like it has been eons since I posted a recipe, and while I have been enjoying sharing more life updates and fun posts it is time to get back to where this blog is really at. Allergy-friendly food!

Yesterday I whipped up a batch of pancakes which I adapted from PaleOMG. Her recipe called for milk which I decided to increase and then replace with a mixture of yogurt to up the protein content. I also added a teaspoon of apple cider vinegar to replicate the taste of buttermilk and to sour the yogurt for a more traditional pancake flavor. Along with the eggs and coconut flour, the added yogurt amps the protein content of these pancakes up to 32 grams total or 16 grams per serving for two servings. For a recipe that tastes as delicious as this, that number is pretty impressive.

Basic Paleo Pancakes

I further adapted the recipe by omitting the added honey and raspberry lemon topping so that these would be plain. That way this recipe can serve a base pancake and you can add whatever your heart desires! The yogurt and coconut flour add even sweetness naturally but if you prefer a dessert-like pancake you could add in a tablespoon or two of sweetener (honey, maple syrup, stevia or coconut sugar to keep them paleo).

Basic Paleo Pancakes

Grain/Gluten/Wheat-Free, Nut-Free, Dairy-Free Option, Paleo-Friendly, No Sugar Added

Makes 2-3 servings; 10 pancakes total

Adapted from recipe by PaleOMG

Basic Paleo Pancakes

Ingredients:

  • 1/2 cup yogurt (use coconut or almond yogurt to make dairy-free)*
  • 1/2 cup water*
  • 1 tsp apple cider vinegar
  • 3 large eggs
  • 1 tsp vanilla
  • 1/2 cup coconut flour (link)
  • 1/2 cup tapioca flour (link)
  • 1/2 tsp baking powder (link)
  • 1/2 tsp baking soda
  • 1/8 tsp salt

Directions:

  1. Preheat griddle to 350 degrees or a skillet to medium-high. Coat with oil to prevent sticking.
  2. Mix together the yogurt, water and vinegar. Set aside.
  3. In a small bowl combine the dry ingredients. In a separate larger bowl then combine all of the wet ingredients.
  4. Add the dry ingredients to the wet ingredients and stir until thoroughly incorporated. Let rest for a few minutes so that the coconut flour can thicken up the batter. After about 5 minutes check the batter. It should be the consistency of regular pancake batter- thick but easily pourable. Add additional water to thin out or additional coconut flour to thicken if necessary.
  5. Using a 1/4 cup measuring scoop pour the pancake batter onto your griddle/skillet, spreading it out with the back of the scoop. Cook for about 3 minutes on each side. Repeat for additional pancakes.
  6. Drizzle with honey or maple syrup, top with your favorite add-ons like diced apples or berries, and enjoy!

*Note: If you don’t have yogurt on hand, you can also replace the yogurt/water mixture with 1 cup of milk. Start off with about 1/2 cup and increase as needed to ensure the batter doesn’t get too thin. I’ve used 1 cup coconut milk before and that worked well.

Basic Paleo Pancakes

Even though the pancakes went cold as I was taking pictures and I had to reheat them (whoops!), my family still said that these were the best grain-free pancakes that I had made yet! They are much lighter and fluffier than most grain-free pancakes because of the tapioca flour and baking powder lending themselves to become a staple in anyone’s breakfast rotation.

If you are wanting to make pancakes but don’t have either coconut flour or tapioca flour on hand, check out my pancakes tag for alternative recipes to hold you over in the meantime.

——————————————————————————————————————————

Questions for you:

  • What are you having for breakfast today?
  • How do you increase the protein in your breakfast? 
  • Have you ever used tapioca flour before?
  • What would you mix into these pancakes? 

Marvelous/Not So Marvelous… And an Oatmeal Recipe

Marvelous is… the fact that I found an old bag of black licorice cough drops in our medicine cabinet.

Not so marvelous is… the fact that I even NEED cough drops due to “the plague.” 😉

Marvelous is… watching the first Teenage Mutant Ninja Turtles with my mom.

Not so marvelous is… now I’m craving pizza.

mimm-ninja-turtles

Marvelous is… celebrating one of my friend’s birthdays tomorrow.

Not so marvelous is… if I don’t get over this cold/virus/whatever-it-is I won’t be able to go.

Marvelous is… making breakfast on an actual stove every morning for my parents.

Not so marvelous is… Okay, I can’t really find anything wrong with this oatmeal. Ha.

Banana and Maple Pecan Oatmeal

Banana and Maple Pecan Oatmeal

Gluten/Wheat-Free, Vegan, Nut-Free Option (in Notes below)

Makes 1 serving

Ingredients:

  • 1 cup liquid (1/2 cup water + 1/2 cup milk)
  • 1/2 cup quick oatmeal
  • 1 tbsp ground flaxseed (ground chia would work too)
  • 1 tbsp sweetener
  • 1/2 banana
  • 1/2 tsp cinnamon
  • dash of salt
  • “Maple pecans”: 3 tbsp pecans, 1 tbsp maple syrup, 1/8 tsp cinnamon, dash of salt
  • optional toppings (I used melted almond butter)

Banana and Maple Pecan Oatmeal

Directions:

  1. Heat liquid on high until boiling. Add oatmeal and flaxseed. Reduce heat to medium and stir occasionally for about 5 minutes or until thickened.
  2. Slice the 1/2 banana on top of the oatmeal. Stir and let sit for a minute until the banana gets soft. Using a fork whip the oatmeal incorporating the banana until smooth. Mix in the cinnamon and salt then pour into a bowl.
  3. In the now empty pan put the pecans, maple syrup, cinnamon and salt. Heat on medium until the syrup begins to boil and thicken. Pour onto the oatmeal and top with optional toppings.

Notes: To make this vegan/dairy-free use a dairy-free milk like almond milk or coconut milk. You could also just use all water for the liquid to make it nut-free but it won’t be as creamy. For the nuts, feel free to omit or replace with a nut-free version like sunflower seeds, pepitas, a diced banana or apple.

Marvelous is… doubling the recipe to make it for two.

Not so marvelous is… not having the right-sized pan and the liquid spilling over causing your stove to smoke. My bad.

Banana and Maple Pecan Oatmeal

Marvelous is… the truckload of Christmas pictures that I have to share with you.

Not so marvelous is… having to upload and edit them all.

So while I get on that, make this oatmeal, pop in Teenage Mutant Ninja Turtles, and get to reading some of the other posts that are linking up to Katie’s Marvelous in my Monday.

Hopefully I will be feeling better and able to comment on some of your posts that I’ve missed in the past week or so. Time to return to the land of the living! 😉

————————————————————————————————————————————

Questions for you:

Which Ninja Turtle is your favorite? I’m partial to the one in red, Raphael. 

According to Nickelodeon’s survey though, I’m DONATELLO!

Like Donatello, you are a brilliant inventor. You may not make all of the Turtles’ gadgets, weapons, and vehicles, like he does, but you’ve got the brains for it! But sometimes you and Donnie are too smart for your own good, like when you’re too busy admiring an enemy’s futuristic laser cannon to run for your lives. But when it comes down to it, it’s other people’s lives that really keep your head in a mission. You fight with your heart, and that makes you a very powerful warrior.

What’s your favorite cough drop flavor? Black licorice obviously.

Have you gotten all of your Christmas photos/recaps up yet? I’m pretty sure I’m the last one…