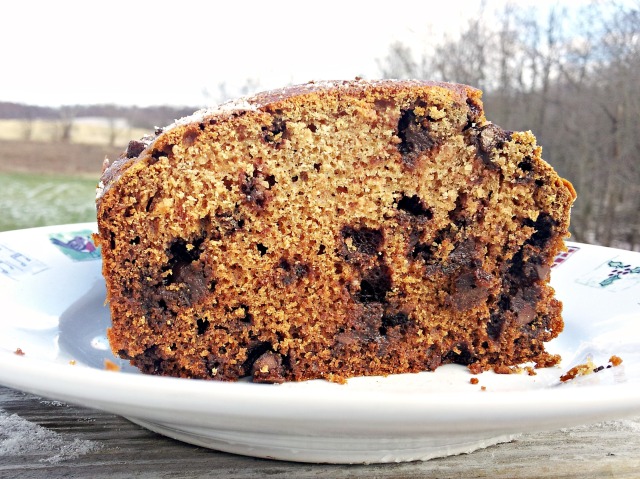
Smile, It’s WIAW (Amish Friendship Bread)

My butt is so cold right now.

Sorry, too much information you guys. I’m just so stinking happy. Seriously, I’m grinning from ear to ear. Hat-covered ears I may add.

If for some reason you are pinning my image, you are weird and awesome.

You see, on Friday I said that I was going to be stargazing for my astronomy class, but that ended up being cancelled due to bad weather. This week is the last chance for students to do it, and my teacher said that with the weather we’ve been having, the chances were just not very good that they would be able to hold anymore stargazes this semester. Since completing one was required for my class, you can just imagine the mental breakdown I had when I realized that I wouldn’t be able to do it. There were a lot of tears, a lot of talks with my mom, and finally at the end of it all… acceptance. I had to accept that it was my fault, nothing could be changed, and I would just be more proactive with my next class. (Edited to add: I still would have received credit for my class if I hadn’t been able to go the stargazing, but since it was mandatory my grade would have dropped significantly.)ย 

As my mom said in one of our Facebook conversations, “Remember all of these life experiences make us stronger.” To which my response was, “Ya. Ya.” ๐Ÿ™„ But I knew she was right.

Quick and Healthy Amish Friendship Bread (With Paleo and Non-Paleo Directions!)

Why may you ask am I smiling then? Because I didn’t give up. I kept on calling the planetarium, hoping each night that the automated voicemail would change, saying that the stargaze was on for that night. And finally it was.

All of the praying and hoping, and tonight I got to stand on the top of the astronomy building roof with a wind chill below 5 degrees and look at the stars with 19 other students who would rather have been anywhere but there. As I said, my butt is cold. Like so cold that I have been sitting inside for 30 minutes and it still hasn’t “defrosted” yet. But that’s okay. Because I’m happy.

Quick and Healthy Amish Friendship Bread (With Paleo and Non-Paleo Directions!)

Do you know what else makes me happy?

Seeing all of the bloggers who have signed up so far to help with my 12 Days of Allergy-Free Christmas Recipes. It is going to be amazing. If you haven’t already, check out what we are up to, and if there are still spots left when you read this, sign up! ๐Ÿ™‚

12-days-1

Another thing that makes me happy would be that it’s Wednesday. Aka the best day of the week (well, as far as the blogging week is concerned at least).

The recipe that I am sharing today is a quick version of the usually yeast-based Amish Friendship Bread. If you have never tried the original recipe, you are missing out. It requires a process of letting the bag of batter sit for 10 days, with you mixing new ingredients in every few days. Then when the 10 days are up you take 1/4 of the batter and add a whole bunch of other ingredients (like flour, sugar, pudding mix, etc.) and then bake it up into wonderful loaves. With the remaining batter you now have more bags to pass onto friends (hence the “friendship” part of the title) or to freeze and keep for yourself.

What do you do when you don’t have a batch of starter lying around though? Or what if you just don’t want to wait 10 days for loaves of deliciously sweet bread? Enter my solution:

Quick and Healthy Amish Friendship Bread (With Paleo and Non-Paleo Directions!)

Quick and Healthy Amish Friendship Bread

Grain/Gluten/Wheat-Free, Nut/Dairy-Free Options, Paleo

Makes 2 loaves, 8 thick slices each

Quick and Healthy Amish Friendship Bread (With Paleo and Non-Paleo Directions!)

Ingredients:

  • 1/2 cup yogurt (I used cow but coconut would also work to make this dairy-free) + 1 tsp apple cider vinegar
  • 3 eggs
  • 1/2 cup melted coconut oil/butter/ghee
  • 1 cup granulated sweetener (I used Monk Fruit in the Raw, but coconut sugar, date sugar or baking stevia would work too)
  • 1/2 cup honey (or maple syrup)
  • 1 tsp vanilla
  • 3 cups flour*
  • 2 tsp cinnamon
  • 2 tsp baking soda
  • milk (as needed— reference notes section below)
  • 2 cups chocolate chips (or homemade carob chips)
  • granulated sweetener and cinnamon for topping

Quick and Healthy Amish Friendship Bread (With Paleo and Non-Paleo Directions!)

Directions:

  1. Preheat oven to 325 degrees. Line two loaf pans with parchment paper.
  2. Mix together the yogurt and vinegar; set aside for 5 minutes.
  3. After the yogurt has set, combine the eggs, oil, granulated sweetener, yogurt and vanilla together in a large bowl.
  4. Add the dry ingredients and stir just until combined. (Add milk if using all purpose flour to consistency).
  5. Stir in the chocolate chips.
  6. Divide the batter equally among the two lined pans. Sprinkle some granulated sweetener and cinnamon.
  7. Bake for 60-120 minutes. (I give the large range here because you should be checking probably starting at 1 hour and then in frequent intervals thereafter. This bread took about 90 minutes for me to bake, but oven temperatures vary so much, as do ingredients, that it would be wise to check often. Also, I baked the two loaves together in the oven, so if you bake them separately you will need to cut the baking time). The bread will be done when there is a golden crust on top, it springs back to the touch, and a toothpick comes out clean. Check for all 3 to ensure a perfectly baked bread.
  8. Let cool for at least half an hour before slicing. Enjoy!

*Notes: To make this grain-free use almond flour (or another nut/seed flour). The grain-free version fell for me in the middle a bit and isn’t as pretty as these pictures, but ย it was still equally delicious. You can also use all purpose flour as most of the pictures reflect, but you will probably have to add some milk to thin the batter out. I added about 1/2 cup milk to reach a good, pourable consistency. And though not tested, an all purpose gluten-free flour blend should also work well in here; add additional milk if needed.

Quick and Healthy Amish Friendship Bread (With Paleo and Non-Paleo Directions!)

Thanks again to Jenn for hosting this lovely weekly round-up where we all get together and share great food!


——————————————————————————————————————————

Questions for you:

  • What is making you smile today?
  • Is there anything that you almost gave up hope on, but ultimately came through for you?
  • How cold is it where you live?ย 
  • Have you ever tried Amish Friendship Bread before?
  • What are you sharing for WIAW this week?

Three Things for Monday

I have just three quick things to share on this Monday morning. Then I’m off to classes!

First, one final call for any questions that you all would like to know about Lindsay Nixon and her new cookbook Happy Herbivore Light and Lean. I already have a list of interview question ideas to send but if anyone has suggestions they are welcomed!

mimm-lindsay

Second, a quick recipe to share ๐Ÿ™‚

Pumpkin Bread Bake with Pumpkin Frosting (Grain-Free)

Pumpkin Bread Bake with Pumpkin Frosting

Adapted from my Banana Bread Bakeย –ย Makes 2 servings

Wheat/Gluten/Grain-Free, Vegetarian, Nut-Free, Paleo/GAPS-Friendly

Pumpkin Bread Bake with Pumpkin Frosting (Grain-Free)

Bread ingredients:

  • 6 eggs
  • 1 cup pumpkin puree
  • 2 tbsp honey
  • 1/4 cup coconut flour
  • 2 tbsp cinnamon
  • 1/8 tsp nutmeg
  • 1/8 tsp ginger
  • dash of salt
  • 1 tsp baking soda

Frosting ingredients:

  • 1/4 cup plain yogurt (use coconut yogurt to make dairy-free)
  • 2 tbsp pumpkin puree
  • 1 tbsp honey
  • 1 tsp cinnamon
  • dash of salt
  • 1 tbsp coconut flour (more or less as needed)

Directions:

  1. Preheat oven to 375 degrees. Oil/grease two large ramekins (I used a Pyrex 4-cup round bowl likeย this oneย that is around 6 inches in diameter).
  2. Crack the eggs into a food processor and blend until it is one solid color. When the eggs are blended add the pumpkin puree and blend until smooth.
  3. Then add in the coconut flour, spices and salt. Blend again until fully incorporated.
  4. Now you should add the baking soda, but wait to do this until the oven is fully heated and right before you are ready to pour the batter and bake. You donโ€™t want the baking soda to react and then the mixture to sit for too long. So, once the oven reaches 375 degrees, add the baking soda and blend again for a few seconds.
  5. Pour the batter into the ramekins and place them directly into the oven. Bake for about 40 minutes until golden brown. The top should spring back to the touch and the edges should begin to look barely darkened.
  6. Meanwhile mix up the frosting in a small bowl. Add coconut flour as necessary to thicken it up.ย Place in the fridge until ready to use.
  7. Let the breads cool for a few minutes when done, remove onto a plate and top with frosting to serve.

Recipe notes: I made this a two-serving recipe but it can easily be a single-serving. The bread would be 3 eggs, 1/2 cup pumpkin puree, 1 tbsp honey, 2 tbsp coconut flour, 1 tbsp cinnamon, dash of nutmeg/ginger, dash of salt, 1/2 tsp baking soda. And the frosting would be 2 tbsp yogurt, 1 tbsp pumpkin puree, 1/2 tsp cinnamon, 1/2 tbsp honey, dash of salt, 1 1/2 tsp coconut flour. For half of the recipe you should check the bread at 30 minutes as it will probably take less time than the 40 minutes for two ramekins.

Pumpkin Bread Bake with Pumpkin Frosting (Grain-Free)

Third… the winner of The China Study Cookbook!

giveaway-cookbook-collage

Using the True Random Number Generatorย the winner of the giveaway is:

mimm-giveaway-winner

Congratulations Sarah from Slices of Sarah Pie! Please e-mail me at alleyhays [dot] gmail [dot] com with your address so that BenBella Books can get you the cbook right away ๐Ÿ™‚

Thank you for all who entered. If you didn’t win the cookbook and would still like a copy, you can purchase both the kindle and paperback editions on Amazon.

————————————————————————————————————————————————————————————————

I’d say all three of these things are pretty marvellous, wouldn’t you? That’s why I’m linking up to Katie at Healthy Diva Eat’s MIMM.

What I Cooked Up (WIAW)

Good morning and happy What I Ate Wednesday! I’m very excited to share with you all of the things that I cooked up over the weekend for my family members. This time I didn’t even have to break the rules to participate in WIAW because I actually have a food picture for every meal of the day! (Even though they aren’t exactly MY eats… It’s one step closer ๐Ÿ˜‰ ).

Thank you to Jenn for hosting WIAW. Be sure to check out the other great bloggers who linked up their daily meals today!

wiaw-breakfast

I feel very confident in saying that there isn’t anything better than a bread-type good for breakfast. Whether it be pancakes or waffles, muffins or bagels, they just have a way of filling that craving that only bread can do. I think that’s probably why there are so many new healthy takes always emerging on breakfast breads. People just love them.

Today I am going to be no different in that here is my newest take on a healthy breakfast bread (adapted from Pencils and Pancakes’ recipe only because I didn’t have all of the ingredients on hand at the time). It’s delicious, high in protein, includes only quality ingredients, and doesn’t contain any added unhealthy sugars! Plus, as always, it’s gluten-free ๐Ÿ™‚ For the topping I made a slightly modified (note: sweeter) version of Yeah… Imma Eat That’s frosting recipe. Paired together they are a match made in heaven.

Banana Bread Bake with Nut Butter Frosting

Wheat/Gluten/Grain-Free, Vegetarian, Nut-Free Option, Paleo/GAPS-Friendly, No Sugar Added

Makes 1 large serving for breakfast or 2 smaller servings for a snack

Bread Recipe adapted from Pencils and Pancakes

Frosting Recipe adapted from Yeah…Imma Eat That

Banana Bread Bake with Nut Butter Frosting (Grain-Free with Nut/Dairy-Free Options)

Bread Ingredients:

  • 3 large eggs (preferably organic or cage-free)
  • 1 ripe banana
  • 2 tbsp coconut flour
  • 1 tbsp ground cinnamon
  • dash of sea salt (optional)
  • 1/2 tsp baking soda

Frosting Ingredients:

  • 2 tbsp nut butter (use sunbutter to make nut-free)
  • 1 tbsp honey (or maple syrup)
  • 1/4 cup plain yogurt (use coconut yogurt to make it dairy-free)
  • coconut flour (optional- use if needed to thicken up the frosting if it seems too thin)

Directions:

  1. Preheat oven to 375 degrees. Oil/grease a large ramekin (I used a pyrex 4-cup round bowl like this oneย that is around 6 inches in diameter).
  2. Crack the eggs into a food processor and blend until it is one solid color. Meanwhile peel the banana and when the eggs are blended add the banana and blend until smooth.
  3. Then add in the coconut flour, cinnamon and salt. Blend again until fully incorporated.
  4. Now you should add the baking soda, but wait to do this until the oven is fully heated and right before you are ready to pour the batter and bake. You don’t want the baking soda to react and then the mixture to sit for too long. So, once the oven reaches 375 degrees, add the baking soda and blend again for a few seconds.
  5. Pour the batter into the ramekin and place it directly into the oven. Bake for 30-35 minutes until golden brown. The top should spring back to the touch and the edges should begin to look barely darkened.
  6. Meanwhile mix up the frosting in a small bowl. Add a sprinkle of coconut flour if necessary to thicken it up. If using a low fat/fat-free yogurt this may be necessary. Place in the fridge until ready to use.
  7. Let cool for a few minutes, remove onto a plate and top with frosting to serve. (I did not use all of the frosting so you may have some leftover).

Banana Bread Bake with Nut Butter Frosting (Grain-Free with Nut/Dairy-Free Options)

wiaw-lunch

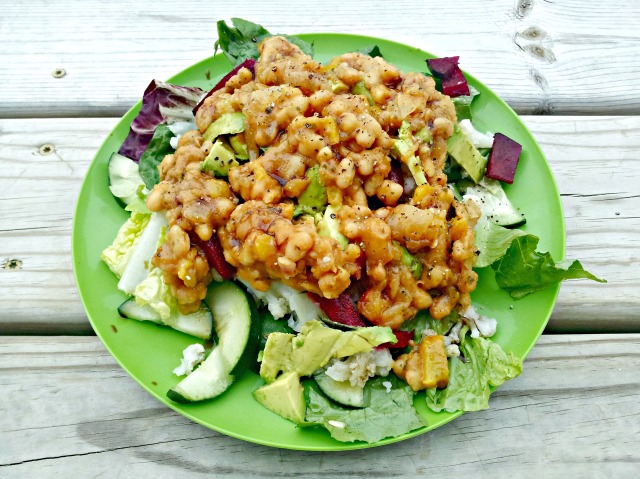
Lucky for you, the rest of the recipes for today’s WIAW have already been posted as well, so no waiting around like usual. This recipe that I made comes from The China Study Cookbook. I shared the recipe excerpt on Monday as part of my (very long) review on the cookbook. Be sure to check it out and make this incredibly easy, vegan meal. And while you’re there, you might as well join the giveaway to win your own copy of the book!

Dominican Beans

Dominican Beans from The China Study Cookbook (Vegan and Gluten-Free)

While the recipe makes multiple servings, it isn’t something that you have to eat right away. We saved about half of the beans for my parents to take for lunch for the week. As for the salad on the bottom, I made just enough for two. If you want the prep to be even quicker you could cut up all of the vegetables ahead of time, assemble the salads as needed, and then just heat up whatever portion of the beans you want for the topping. Easy peasy.

Dominican Beans from The China Study Cookbook (Vegan and Gluten-Free)

wiaw-dinner

Egg in a Squash

This recipe is so fast and simple that it’s no wonder that so many bloggers have tried it in just the few short weeks since Meg at A Dash of Meg posted about it. Egg in a Squash is really just what it sounds like. I took half of a cooked dumpling squash (cooked using this method), cracked in an organic egg, and then baked it at 425 degrees for about 35-40 minutes.

Egg in a Squash

Meg’s original directions call for a slightly shorter cooking time, but for this first try I didn’t want to take any risks so I made sure the egg was thoroughly cooked. If you like runny yolks though, follow Meg’s instructions. I will probably try that next time and see how my Dad likes it.

Egg in a Squash

wiaw-dessert

Apple crisp is basically the quintessential fall dessert (along with pumpkin pie, apple pie, etc. of course ๐Ÿ˜‰ ). But really, apple crisp was one of my favorite desserts that our school cafeterias served growing up. I’m not sure what they put in it, but man was it good!

No worries with this one though. All of the ingredients are easily recognizable. Originally this recipe was for pear crisp but I just did a little swapping and made an apple version instead (see below the second picture for my alterations).

Apple Crisp (Grain-Free and Vegan)

Apple Crisp (Grain-Free and Vegan)

I did change a few things from the first recipe, but both are equally amazing. This time I used coconut oil in place of the butter/ghee to make it dairy-free as well as vegan. And obviously I used apples in place of the pears (I only needed 5 apples though versus the 6 pears in the original recipe). Also, I covered the apple crisp in foil for about half of the baking time, as well as doubled the time that I left it in the oven so that the apples got cooked completely. Soft and delicious. If you make it, I’d suggest focusing more on the texture of the fruit for how long it needs to be in the oven, and the look of the crisp for whether or not you need to top it with foil so that it doesn’t burn.

Apple Crisp (Grain-Free and Vegan)

And guess what?! I think I can call this another mission accomplished for my Friday Food Finds #13. It’s been awhile since I’ve been able to say that ๐Ÿ™‚ I made 3 out of the 5 recipes from that post so it’s definitely a success. I still have my eye on making the other two and I’ll let you know if I try them.

Friday_Food_Finds-13

My Friday post may be a little shortened this week, and my commenting may be somewhat sporadic as well as I have midterms all week long. Today I have a quiz in Statistics, tomorrow I have a quiz in Business Communications and an exam in Music Cultures, and then on Friday I have an Astronomy exam plus an Accounting quiz. Wow. Typing that out makes me realize how busy I really am going to be! While I may not have much time to post on here, I will for sure be keeping my Instagram updated so follow me on there for my latest life updates ๐Ÿ™‚

—————————————————————————————————————————————————————————————–

Questions for you:

Do you like bready breakfast foods?

Have you entered my giveaway yet?

What is your favorite simple meal?

Pumpkin Pie Bars (WIAW)

Instead of beating around the bush I am going to jump right into my recipe. For today’s WIAW party hosted by our wonderful host Jenn, I am going to be sharing with you a recipe that is completely opposite from what I posted last week.

That’s right. It’s all about the pumpkin baby! (For some strange reason I said that in an Austin Powers voice. Sue me).

Egg-free, dairy-free, gluten-free, and so yummy that you will want to eat the entire batch.

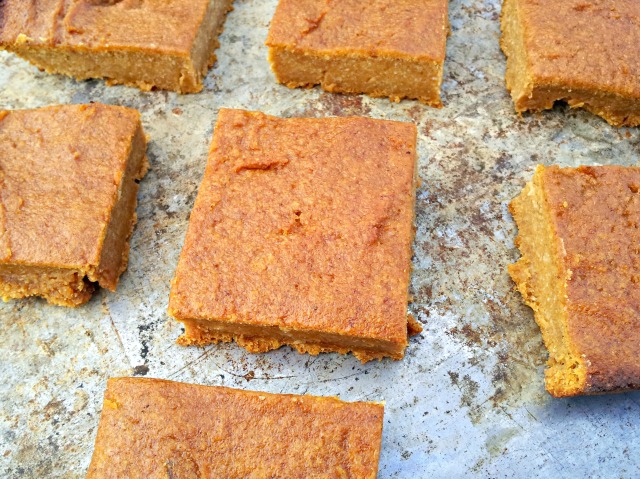
Pumpkin Pie Bars (Vegan and Grain-Free)

Really. It’s okay if you don’t want to share. We will understand.

I have to admit that at first I thought this was recipe was going to be an utter failure. It turns out that it just needed awhile to bake to perfection. Good things do take time after all.

Pumpkin Pie Bars (Vegan and Grain-Free)

I also had a hard time in coming up with a name for these things. Pumpkin cookie bars? Pumpkin bread bars? Nah. None of those were quite… right. But then my dad ate one and said, “Do you know what these remind me of? Pumpkin pie!” Bingo.

And so the Pumpkin Pie Bar was born.

Pumpkin Pie Bars (Vegan and Grain-Free)

Pumpkin Pie Bars

Wheat/Gluten/Grain-Free, Vegan, Nut-Free Option, Paleo/GAPS-Friendly

Makes 9 squares

Pumpkin Pie Bars (Vegan and Grain-Free)

Ingredients:

  • 1/4 cup water
  • 1 medium banana, ripe
  • 1 cup pumpkin puree
  • 1/2 tsp vanilla
  • 1/2 cup honey (or maple syrup)
  • 3/4 cup ground flaxseed
  • 1/3 cup coconut flour
  • 3/4 cup almond flour (any other nut or seed flour would work too)
  • 3/4 tsp sea salt
  • 2 tsp cinnamon
  • 1/2 tsp nutmeg

Directions:

  1. Preheat oven to 350 degrees. Line an 8×8 or 9×9 casserole dish with parchment paper and coconut oil if desired (I added the oil just to ensure that this wouldn’t stick and I suggest that you do the same since there is no added oil in the recipe itself).
  2. In a food processor place the water, banana, pumpkin, honey and vanilla and combine until smooth. Alternatively you could just mix it by hand.
  3. Then in a bowl combine the flaxseed, coconut flour, almond flour, sea salt, cinnamon and nutmeg.
  4. Next stir in the wet ingredient mixture until fully incorporated. (Don’t worry about overmixing since there is no gluten in here. Just make sure that it’s well combined).
  5. Let the mixture sit for at least five minutes so that the coconut flour and flaxseed have time to thicken up.
  6. Then spread out the batter into the lined/oiled pan.
  7. Bake for around 70 minutes (I would check after an hour and then every few minutes after that). The end result will be very moist, but will have formed a noticeable soft crust on top. Let cool for about 10 minutes before removing to a rack to cool completely.
  8. You can slice and serve the bars then, or place them in the fridge overnight to firm up even more. Enjoy!

Pumpkin Pie Bars (Vegan and Grain-Free)

Pumpkin Pie Bars (Vegan and Grain-Free)

Recipe thoughts: I am not sure how this recipe would turn out if you tried to use eggs in place of the flaxseed mixture. If I ever do try a version like that of course I will let you all know. For the flaxseed you may be able to substitute chia meal but again, I cannot confirm that this will work since I haven’t tested it personally. One additional thought that I hope to be experimenting with soon is to use banana in place of the pumpkin for banana bars. Or maybe replace the almond flour with carob/cocoa powder for a brownie-type recipe. Again, all just thoughts that I thought I’d share in case you’d like to experiment on your own!

Also shared at: Allergy-Free Wednesday, Gluten Free Tuesday, Gluten-Free Wednesdays

——————————————————————————————————————————————————————————————————–

Thank you for all of your suggestions on yesterday’s post! In case you missed it, I am looking for magazine subscription suggestions. If you have something that you think I’d like to read, you can leave a comment in that post. Wednesday night I will be making the final decision and will let you know what I choose.

Are you a fan of pumpkin pie?

Have you gotten into the baking spirit yet or are you still holding out for summer?